House Move, Makey Makey GO, Bazik and Ni-Mate 2!


Hi All,

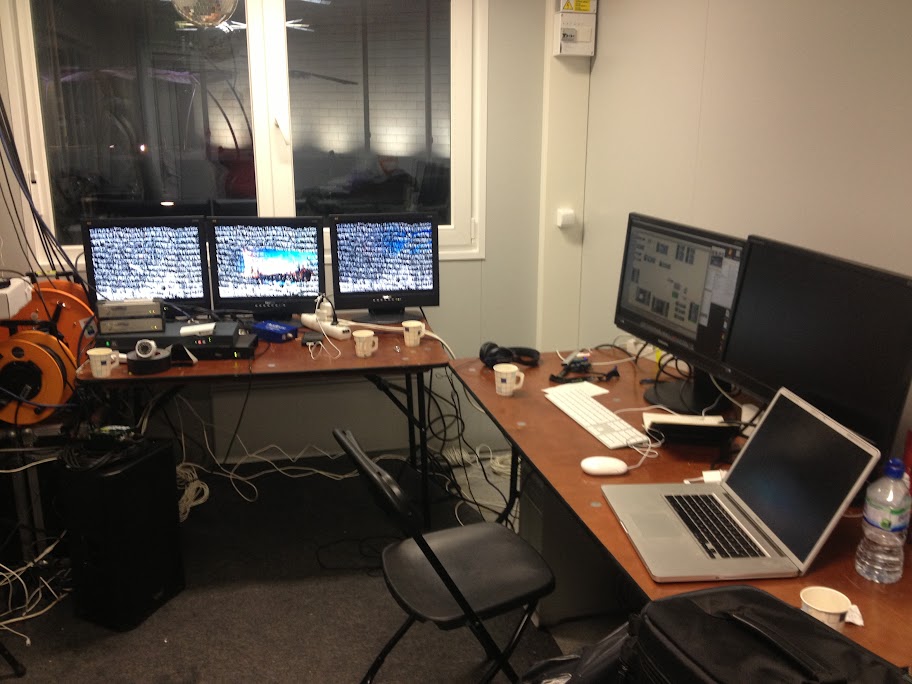
I’ve been pretty awful at blogging lately. Sorry about that. I’ve been moving house and working hard at my day job. I do however have a lovely new desk to do my audio-visual work and lots more room to play. By play I mean make music, edit video, program Isadora and plug my kinect sensor into Ni-Mate and other software.

desk_1

desk_2

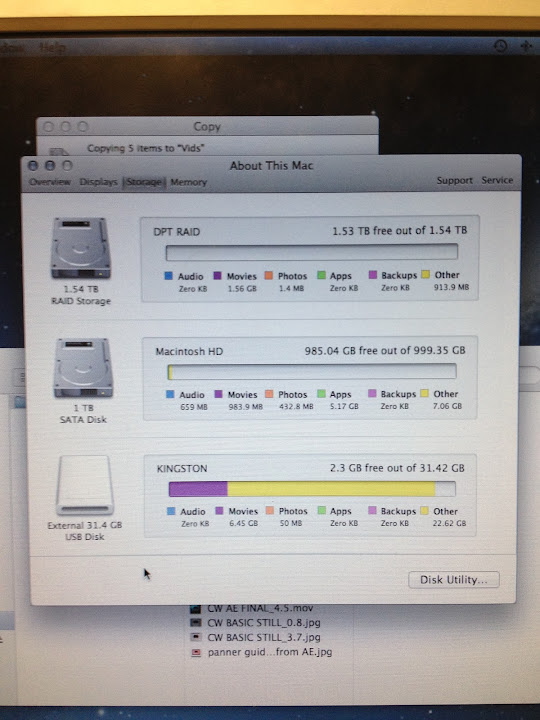
I now have a gaming PC which doubles up as a Audio-Visual work horse. It’s pretty decent spec but nothing too fancy. I have Isadora on here to help with testing and stuff. I now can also install other windows based software and muck about. It’s quite handy having a mac and a windows PC. I try and not be a mac or windows hater, I just use both!

I have a snazzy new Novation keyboard for use with Ableton and lots of space for my cables and “junk” as my wife calls it! 🙂 haha.

I got a message a few weeks ago from my good pal Julius from Delicode asking if i’d help him test Ni-Mate version 2.0 and of course I said yes. I helped quite a lot with the first version and I was very pleased to be a part of it. So, it’s public knowledge now as they did a blog post a few days ago:

http://www.ni-mate.com/ni-mate-v2-0-announcement-beta-applications/

“It’s been nearly a year since we last put out an official update to NI mate. This doesn’t mean that we’ve stopped working on the software – on the contrary. We’re happy to now announce on the blog that for the past 1,5 years we’ve been hard at work preparing NI mate v2.0 for an eventual release in July 2015.

While we’re launching a complete redesign on NI-mate.com as well as a thorough blog post about the updated features and business model in June, some of the things to look forward to include: extended sensor support (adding support for the new Kinect for Windows/XBOX One and Leap Motion), simultaneous sensor support (run multiple sensors in a single instance of NI mate, even mixing different sensor types), BVH/FBX export and an official Autodesk Motion Builder plugin.

Existing purchases of NI mate v1.0 will continue to work forever. Similarly v1 license owners will be offered a generous upgrade path in case they would like to enjoy the new features offered in v2.0. While we’re preparing the new software for official release, we’re also looking for a few good participants in a closed beta. In case you think you would be a good fit, please feel free to send us an application by filling in this form (requires a Google account).”

I also ordered a new toy called the Makey Makey GO. I already have the classic Makey Makey, but thisones is smaller, magnetic and does not require an earth wire. It’s hard to explain exactly what it does and how it does it but you can read more here:

https://www.kickstarter.com/projects/joylabz/makey-makey-go-invent-everywhere-invent-now

They are really cool devices. I have used them for all sorts and I am hoping to use a few for an instillation at the museum. I may do a full blog post about that at some point.

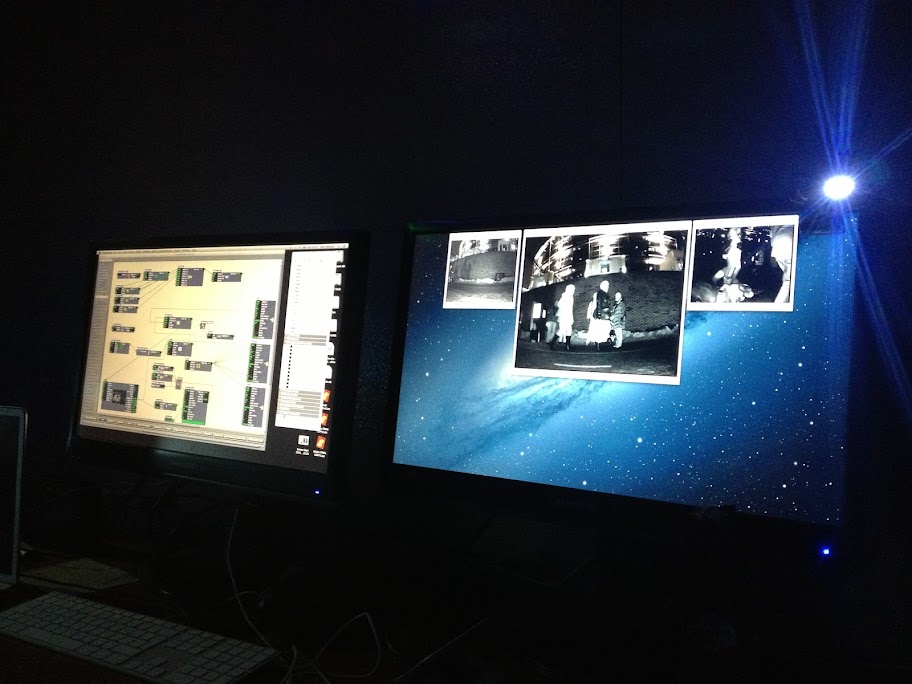
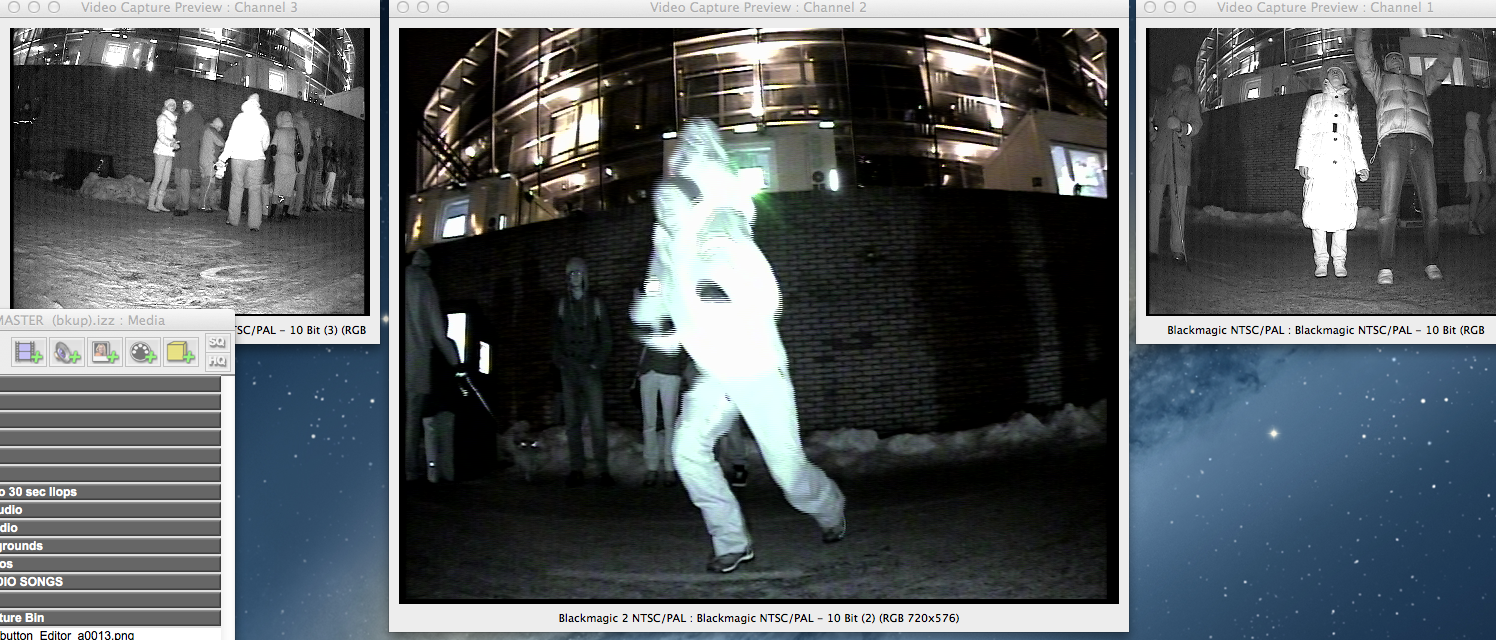
I am also now beta testing and using a new amazing software called Bazik which is an audio responsive software with Syphon out, MIDI, OSC and much more!

Here is a screenshot of it running into Isadora via Syphon:

So, that’s a little update from me. I have been working hard with the rest of the Isadora crew on testing, problem solving and much more. If you have not checked out Isadora 2 then I suggest you check it out now!

http://troikatronix.com/new-in-isadora-2-0/

Off to bed now! Talk soon folks!

Graham (aka skulpture)

Isadora & Ableton Live Virtual MIDI [part 2]


This is very similar to my previous video about Isadora and Ableton Live (part 1). But rather than using MIDI notes (triggers) I have used MIDI automation data.

Needless to say you can have multiple clips sending out multiple data feeds. Possibilities are endless really.

The above method is really good for syncing effects with Abelton and Isadora in a VJ or AV performance.

Any questions or comments… post below.


Thanks,

Graham

Projection Mapping in Isadora


This post is to help people understand and get started with Projection Mapping in Isadora. It is not an complete walk through or advanced post (you are best asking on the Isadora forum for advanced topics) but hopefully this will shed some light for new users, or those new to the idea of mapping.

What is mapping?

Mapping has been around for quite some time but my opinion is that it is the art of cutting up images and video to line up with complex shapes that are not the usual method for of display pictures and/or video. It allows artists to project onto buildings, cars, sculptures and custom built sets or similar. Basically anything that a light source (a projector) can hit!

Why Isadora?

Obviously you don’t have to use Isadora but one thing Isadora has that none of the other softwares has in the Interactive angle; motion tracking via Eyes and Eyes++ combined with the easy work flow and ever growing community.

Can Isadora do projection mapping already?

Isadora has had features that have allowed basic to fairly complex mapping for quite some time. It’s just the way in which you use them. Granted; it could be better but with a few 3rd part Quartz plugins 99% of things can be done easily.

Here are some basic actor that you should be taking a look at…

Isadora’s Existing Actors…. 

BASIC PROJECTOR

Screen Shot 2013-04-09 at 10.36.30*SOMETIMES* the basic projector can be used. In particular look at the perspective, aspect mod and zoom.

HINT: Hold SHIFT when clicking and dragging values for smaller increments and fine tuning!

PRO’s:

  • Great for projecting on very basic shapes.
  • Helps you understand and learn about perspective and basic 3D perception.
  • Ideal for beginners and not too complex.
  • You can layer up multiple projectors

CON’s:

  • Limited mapping functionality.
  • Won’t do complex mapping (isn’t designed for mapping)

3D QUAD DISTORT

Screen Shot 2013-04-09 at 10.36.59

I use this one a lot. It’s really great for mapping and has enough features to explore new mapping skills but won’t overpower you with scary numbers or names.

HINT: Hold SHIFT when clicking and dragging values for smaller increments and fine tuning!

PRO’s:

  • You can pick each corner of the image/video and move it in an X and Y position.
  • The Z translate (default -2.5) moves the image back and forth in 3D (3 dimensional) space.
  • You can rotate the X, Y and Z axis.
  • Has all the normal features of a the standard Projector actor.
  • Not too overpowering. A nice step up from the Projector actor.

CON’s:

  • You cant add corners or ‘break’ the image up into a grid.
  • It can be tricky at first. Using Shift helps but depending on what you are mapping it can be a bit tedious.
  • It can get complicated when you have a lot of these on your screen. You are best renaming the actor so you can see what’s what; such as “Top Right Window” or “DJ Booth – Left Side”.

Matthew Haber’s Mapping Tools.

Some of you knew this was coming! Pro user Mathew Haber has created a bunch of user actors that make mapping a lot easier. Based on the _1024 Quartz Composer

Matthew has created a topic just for support for the plugins on the Isadora Forum so please ask and discuss them HERE

The Cornerpin Mask user actor is in my eyes one of the best tools ever!

Screen Shot 2013-04-09 at 11.00.48

“This actors offers click-and-drag cornerpinning functionality for masking video. This has built in facilities for rectangular and oval masks and it also accepts a user Image input for any black and white image mask.”

PRO’s:

  • It’s just amazing! it works and makes life easier.
  • The red circles that pop up when you turn Edit on allows you to click and drag the corner to where you want them. Not only this you can do it on the stage output… meaning you can map directly onto objects whilst looking at it. So yes, you literally move your mouse onto the output screen. NOTE: Check in isadora Stage preferences that your mouse is visible on stage output otherwise you won’t see it.
  • Because this is a Mask; you can mask objects. Send in a black and white mask and it will block out areas you don’t want.
  • Easily flick between the type of masks.
  • it’s free – kind of…. Needs Core upgrade of Isadora.

CON’s:

  • There are non really. Who can complain at this? Mathew has spent hours upon hours putting it together and creating it. If there was one negative it is simply that you need the Core Upgrade for Isadora and you have to instal a few bits and pieces; but once its done its done and you never need to do it again.

Syphon it out to somewhere else…

There are lots of other softwares that just do video mapping. And with apple you can send it out via Syphon to another software that can do it all with very advanced features. There is nothing wrong with doing this. Here are a few suggestions….

MadMapper. It’s been around for a while now and appears on all the main forums when you are talking about mapping. They where one of the first to create an external/stand alone mapping application and its developed along the way. It’s not free but it does a great job.

Visution Mapio is a powerful FreeFrameGL plugin for creating projection shows. Now you can work not only with the standard screen, but also with any inclines, including cylindrical and spherical and various shapes.

Shaped by Ixagon SHAPED is a user-friendly projection mapping software. It enables the user to easily map many different surfaces and attach content to them. The content is managed in a sophisticated sequencer similar to those found in video-editing and music-production software.

MeshWarpServer Quite a complex application. Ideal if you have a mesh/3D CAD designs of a building or object. A steep learning curve but it does have Syphon so you can send media in from isadora. Worth a look for those of you with time, patience and advanced 3D knowledge.

There are LOTS more; VVVV, Resolume Arena, Max, MSP, etc.

Hope this helps some of you.

Graham (Skulpture)

Isadora & Ableton with Virtual MIDI [part 1]


As the title says. How to send note values from Ableton to Isadora (works both ways actually)

Video quality isn’t amazing but hopefully its clear enough to see the work flow.

You can also send controller values not just notes.

Any questions ask away….

‘Reveal’ Report Part.2 [LUX – Helsinki]


If you haven’t already, please read Part 1 [HERE]

So, after about a year of planning I flew out to join Dan and two of his third year students from Guild Hall School of Drama (London) in Helsinki. The first thing that hit me was the weather; it took your breath away it was that cold. I arrived about 11:30,  after a beer I went straight to bed… but the next day we got up and went straight to the cabin.

THE CABIN

We had a porta-cabin upon which all the computer hardware was kept. (We where lucky as some people had tents!) And this was pretty much my view for the next 6 days…

Lots of coffee cups lying about!

AND IT BEGINS…

The first two days we had to set up, test and check the system. Then LUX was officially open and the public could all the pieces in full glory. Public viewing times where 4:00 PM until 10:00PM

We spent two days fine tuning and making the Isadora patch perfect. The sun went down about 3 so we had a short while to preview the images properly… this was from day one…

Sorry for image quality I was shaking holding my phone!

Day One

We attracted a lot of attention! So much so that people where blocking the pathway and filling up on the stairs in the image above!

People going about their daily business walking or cycling home had to stop and ask people to move out of the way. It was great to see so early on.

It became clear after only a few hours that children understood it straight away and some of the elder people took a little longer to figure out the concept and interaction. We found that a lot of people didn’t want to interact with the piece and just wanted to watch. But the flow of people made it work anyway. As people walked directly up to the cameras they soon realised that they where blocking the cameras and revealing more of the wall. We had a few dogs sniff the cameras and push buggies also looked good interacting with the wall images as they rolled by.

Some interesting observations for me including a guy swinging a white plastic bag around his head for about half an hour, a man and woman dancing like robots and a small child physically touching the wall and projected light thinking that it was somehow physically interactive.

The first night went really quick and some of the patches didn’t look as good as expected. But overall we where happy…. we then went for a beer and didn’t get home until 4 in the morning! The guys at sun effects looked after us and it was all networking (of course!).

TECHNICAL DIAGRAM

This is just a simple technical diagram to show the workflow.

It’s not the best diagram but it gives you an idea of the layout

‘Reveal’ Report Part.1 [LUX – Helsinki]


Approximately a year ago a good friend of mine Dan Shorten (Anomic) rang me up with an offer I couldn’t refuse….

He needed a bit of a hand with some technical guidance for a project called Reveal which would be shown at LUX, Helsinki in January 2013. So after many trips to London over the last year we developed, tested and created an Isadora patch and I happy report that it all went well.

I have had quite a few people ask me how it worked, technical details and the hardware used. I decided before I went that I’d write a report when I got back so below is as much detail as I can give…

THE CONCEPT

The concept was obviously driven by Dan as the artist. He had the ideas but the odd effect was influenced from me. Dan has some great ideas and nothing is too crazy! I love having a beer with Dan as I can often see him thinking of an idea and I just sit waiting for him to ask me of its possible, then between us we try and make it a reality. This was the case for Reveal.

The concept was started by finding out that Lux had given Dan a huge section of wall to project onto. This is no normal wall, it’s the side wall of a location callee the Baana which is a little tricky to describe, it’s like a mini valley running through the city which used to be a railway line. It had been converted to a walkway and cycle path last year for the locals to get quickly to and from the centre of town.

The image below shows this a little better.

The Banna by day.

We had limited knowledge as to how busy this area would be, obviously not living in Finland we didn’t know the area, the people or the conditions. We also didn’t know how active the people would be. Anyone who has worked with the public will know; people are unpredictable. Would people stop and interact and engage?

Another slight issue was the weather. Saying ‘it was cold’ just doesn’t cut it! It was so cold it hurt… But the local production crew and security firm assured us that it was a ‘good week’ and the week before had it dropped to -25 with the wind chill. This was as cold as the North Pole apparently. I will discuss problem and issues in more depth my next post.

The concept and focus of Reveal was to allow people to reveal parts of the wall and engage them in a variety of different ways. We wanted it to be somewhat random, bright and changing every 10/15 minutes. We didn’t want it to be a self contained and automated system either. We wanted it to be as interactive as possible but we could change the images/video whenever we wanted in response the the audience.

As Dan states on his website;

“…’Reveal’ is an interactive and participatory video installation in which the public can influence their surroundings by “revealing” the hidden possibilities in everyday spaces. Specially composed music and the sounds help create a fascinating new environment”

So we decided for 70% of the scenes in Isadora to use layers. When no one was in the space, or if no one was moving then we would project a near exact digital replica of the wall. It was just like a digital mask. Then the people moving, or the cyclists flying by made the reveal part by becoming active or human masks; moving the digital wall out of the way to see what is underneath. The human/live camera feeds worked as the mask, this raw video feed combined with short video delays, motion blurs and lots of other isadora configurations this made the reveal much more interesting. Image shows this below:

A screen shot of Reveal and the masking idea

Using the Eyes actor in Isadora (which I have a few tutorials on inside this blog!) we used simple but effective calculations, curvatures and scaling to ramp up music samples and background loops. So the louder the music became the more people moved and danced, etc.

This Baana is a new area for Helsinki and the people there where only just starting to use it. It was popular for cyclists though and we had to take that into consideration. As it was unlikely the people on bikes would stop and interact; yet we wanted them to be involved – even if they didn’t know it! So the reveal part of this worked really well because as cyclists went whizzing by the people watching got to see a really cool effect, this then spurred them on to get interactive with the space themselves.

HARDWARE

We used an Apple Mac Pro Tower, which was amazingly specked out!

  • Mac Pro tower 2x 3.06GHz 6 core Intel Xeon
  • 64gig of RAM
  • 1 x TB 7200 drive
  • 3 x 512 SDD drives
  • Mountain Lion OS
  • DataPath x4 DVI graphics expansion module
  • 3 x Panasonic PT EX16KE XGA (1024 x 768) LCD projectors
  • DVI splitters to feed 3 x preview monitors
  • Lots of cables and power.
  • Coffee Machine!

SOFTWARE

Software was just Isadora running version 1.3.0f25. No additional tracking software or fancy quartz plug-ins. Isadora programming at its best!

Isadora had about 20-25 scenes all doing different things, some quite subtly different than others, some very unique. In some patches we used all three live feed cameras and in others just one (generally the middle camera). Again; this was just to mix things up. We had one crash and that was only because we where editing effects live and we messed something up. So its safe to stay isadora worked amazingly.

PRE-PRODUCTION

Dan took a hi-res photo of the wall during his first visit and stitched it together to give us something to work from in terms of scale and general planning. This helped a lot.

In London Dan started work on content for the piece. I seen a few edits whilst I was down there and they looked brilliant. All of the work was done in After Effects and Cinema 4D (which Dan is geting far to good at using!) My only input was general generation of ideas and introducing him to the 3D Element plug in from Andrew Kramer.

We had a few smaller projects on the go which helped us prepare and work out the video mapping side of things which was great. Dan also flew Isadora creator Mark Coniglio over to the UK to run a few ideas past him, ask about hardware set up and generally ask as much as we could whilst he was there. Mark always amazes me at how hard he works and he had some great ideas too.

All video and image files where 2600*600 quicktime running the ProRes codec.

We though we would have to use software edge blending but luckily the projectors had that feature built in so it was less work for the machine. And being a flat wall (well flat-ish) we didn’t require really advanced soft edge blending/warping.

A screen shot of the live CCTV cameras in InfraRed mode.

A screen shot of the live CCTV cameras in InfraRed mode.

Thank you to this person who filmed a bit…. (I have more videos on the way)

// So thats the end of part one…. I will post the next section in the next few days.

Skulpture

Configuring an Apple Mac for commercial/instillation use. [UPDATED]


So for the last 12 weeks I have been working as a Digital Creator at York Museums Trust. This has meant I have had to totally rethink the way in which I use and implement technology. I have not found any forums, Facebook pages or anything for us creative bunch of ‘Digital Creators’ and I feel a little bit on my own in this delicate but creative role. So I decided to use my blog and maybe people will find me along the way!

Forethought 

In some areas of the museum and art gallery spaces there are already a lot of DVD players, TV monitors, projectors, etc that need turning on each morning and off again at night. The tour guides and volunteers already have enough to do of a morning so one important aspect to consider was the starting up and shutting down of the systems. Might sound quite simple… but not necessarily. How do you make sure that a computer is going to behave? Let’s discuss….

Hardware

We use Mac Mini (mostly) for the systems as they are small, quiet, cheap(ish) and have good overall performance. There are enough USB ports and most screens and projectors have HDMI/DVI-D now so its a good choice.

Configuring the OS (tame the lion!)
The first things I did when the machines came where:

  1. Auto-Sign in. So that when a machine stats up there is no password. All of our machines are locked in secure spaces and are trackable anyway.
  2. Disable all energy-saving features. We do not want the HD to go to sleep.
  3. Turn off screen savers. (it might be ok to allow the screen saver now and again – up to you)
  4. Change the wallpaper to something appropriate. Remove icons from off desktop so that if the system does crash then it doesn’t look a mess.
  5. Disable all notifications (note: for Mountain Lion (10.8). This will show you how…[LINK] Even if you disable notifications manually in System Preferences the Apple Software update still show up. It can really get annoying.
  6. Turn on restart if power cut. This is really handy for the rare occasion that a power cut may occur! Obviously.
  7. Turn off all your software automatic updates. Go through all the menus in preferences to make sure!
  8. install VNC or another similar screen sharing software. It’s handy, trust me.

Other things to consider

If like me you are running the machine to power  kiosk style interaction then you need to make sure that the software if going to keep running and running. Obviously testing is the best way to do this. Self testing is ok but you know the system and unconsciously are ‘nice’ to it. Ask a few people from various departments, ages, etc to try it out. Make sure everyone can work the system. See if any other problems occur.

But I decided to create something to make sure the software stayed live and even if the software did crash it would re-open within seconds, it’s all automated and can select precise files to open. I did this using automator (with the help of Mark Conilgio) and posted a link on the Isadora forum (this is the software I use for interactive AV design) The discussion can be found [HERE] You need a little bit of knowledge but if I can figure it out you sure can!

Auto Start/Auto Shut Down
Some of you will know what Apple Macs have a function that ‘Schedule’ the machine to turn off and on each day…
You will find this in Energy Saving in System Preferences

This can solve a big problem already… but what if you need something more advanced? Well I found a brilliant website called If This Then That, also known as IFTTT (I prefer the abbreviation!) And as you can see in this link for the Date & Time channel it can do quite a lot of stuff, and its web-based… BUT it works even better with a WiFi enabled plug! The Belkin Wemo Switch. The two companies have joined forces and API’s to allow each to talk to each other. So you can set the plug to turn on at 8:30 every morning and thus the machine will turn on. This saves energy and also works like a normal plug. [I must warn you at this point that we have had issues with the plug and our WiFi, it works best with ‘normal’ home WiFi and not advanced ultra secure networks like ours at the trust!]

There are other softwares and techniques but for now… the above should help some of you. Next…

How to check it all systems are online?
I can’t walk around all the various sites each morning to check to see if all the machines have turned on and are running. Of course I can ring and ask each site but not very efficient. So I decided to automate something that would let me know. The keyword here is automate and the little app called Automator on Mac is a godsend. I created an app that you can add to your log in items (more detail here) so that as each machine starts up it can either; run a quick and basic terminal command and save it to a drop box folder. So each morning I have a Dropbox folder which I can glance over and see that I have a new system report for each machine (including other system details such as RAM, wi-fi, etc) and if I do not have a report for machine…. then I can investigate! You can change this to take screenshots or anything you fancy really. Oh; and type “last” into terminal for a basic idea of the info I get.

Using my good friend IFTTT (look above if you don’t know what that stands for!) Dropbox is also useable; so a file added to Dropbox can A)email me B)tweet me c)SMS text me D)anything else I can think of that is IFTTT activated! It’s really neat.

So, By 9:00 every morning I already know that my machines are turned on and running. If not I get straight off the train and go and investigate. Most of the time the Internet is down and it just hasn’t synced the file in Dropbox.

I know people will say just use VNC and log into each machine but I really don’t have the time and this was it automatic and I can do it on the train via my iPhone or iPad. I set up a bog standard but hidden twitter account and it tweets my personal twitter account once each file from each machine has loaded before I even get to work. Depending on my 3G signal I receive all the tweets at the same time within a 10 minute period; again its simple and effective.

Final thoughts

Once the system is working then hold off for as looooooooooooooong as you can before updating. If it ain’t broke dont fix it! Even a simple update might change a file or directory that handles video, images, audio, etc. it might take you hours or even weeks to figure it out and that means a lot of down time for the system.

Keep a back up and save it in two or three places. The software files and media need to be backed up. it’s boring but do it! If files are small then email them to yourself or buy a cheap USB hard drive and drop them on there. Put it in a draw and forget about it – hopefully you wont need it.

I would really like to get some dialogue going between other AV creators in this sector. Please drop me a message!

UPDATE JUNE 2015

I have decided to re-visit this post. Two years on and the apple mac’s are still going strong. I had a few teething problems but all went well. My first issue was internet – the Wifi was not strong enough to cope so I do not use IFTTT now. I just have to live and hope! But; I will leave it in my blog as it’s handy for others.

I also use a lot of apple scripts now. I found that they are handy for automating tasks. I then export all scripts and automator workflows as apps and put them in login/start up. Here is a basic one I use to quit all apps and then just open my Isadora patch.

Screen Shot 2015-06-29 at 14.51.17

Once you get into Automator it’s really handy! it can run terminal commands and all sorts.

I also have a few handy links for you:

http://vormplus.be/blog/article/configuring-mac-os-x-for-interactive-installations (a blog similar to this one!)

http://www.interpretationshop.co.uk/product-category/software/ (really cool software and hardware)

https://www.peterborgapps.com/lingon/ (some advanced start up scripts and stuff to make apps re-open on crashes, etc Ive not used it but may do one day for the small fee)

I hope this helps. Comments welcome!

Thanks,

Graham

Kinect for Windows.. Could this be it?!


I have been slightly bewildered as to why the Microsoft Kinect has not really been able to work with windows computers as easily as it has been with Apple Mac; especially in terms of plug-ins. One only has to ‘do a Google’ to see that the majority of software are mac only.

I guess its all down to the drivers and frameworks… (well over my head) but it still seems a bit strange.

The Xbox Kinect. Great for Mac.... its been a long wait for Windows users!

Anyway; many of the Isadora PC/Windows users have been slightly jealous of us apple lot as we’ve been playing around with Kinect sensors for well over a year now via Quartz Composer, Processing, Syphon, etc. But now it seems that there is a Winndows plugin!

The all important link is here:

http://vjfx.com/main/en/mmblog/mmblogintrinsicsrnd/item/64-freeframe-depthcam-plugins

I have not tested it and don’t actually have access to a windows machine right now. But it seems its easy to install and should be fine.

But note: Important: Download and use the 32bit versions of all files, since 64bit versions do not work with the plugins, this also goes for use on Windows 7 64bit!

Enjoy!

MIDI Show Control & Isadora (Mac&Win)


It’s something I have never had to use BUT I know this is going to please a lot of people.

MIDI Show Control communication in Isadora for Mac and Windows machines.

It’s a special little extra made by Mark Coniglio, it’s a quick little manual install and then you’re away! (They go in /Library/Application Support/TroikaTronix/Isadora Plugins or c:\program files (x86)\isadora\isadora plugins)

Please Note: These are experimental and very much a beta item. It is not a full exclusive list and there may be problems. Back up your files and don’t install them an hour before a big performance!

Control’s (so far) include:

01 GO
02 STOP
03 RESUME
04 TIMED_GO
05 LOAD
06 SET
07 FIRE
08 ALL_OFF
09 RESTORE
0A RESET
0B GO_OFF
10 GO/JAM_CLOCK
11 STANDBY_+
12 STANDBY_- 
13 SEQUENCE_+
14 SEQUENCE_-
15 START_CLOCK
16 STOP_CLOCK
17 ZERO_CLOCK
18 SET_CLOCK
19 MTC_CHASE_ON
1A MTC_CHASE_OFF
1B OPEN_CUE_LIST
1C CLOSE_CUE_LIST
1D OPEN_CUE_PATH

Why not head over to the forum, join in the conversation and download them now.